- Community >
- Blog Central >
- Blog by Justine Benstead >
- DIY Tutorial: Beautiful Banners
| Apr 1 |
DIY Tutorial: Beautiful Banners
|

 Do It Yourself projects are meant to be creative ways to save money, do something yourself, and enjoy the satisfying feeling of creating something that you, or others, will appreciate.
Not particularly crafty? Not a problem!
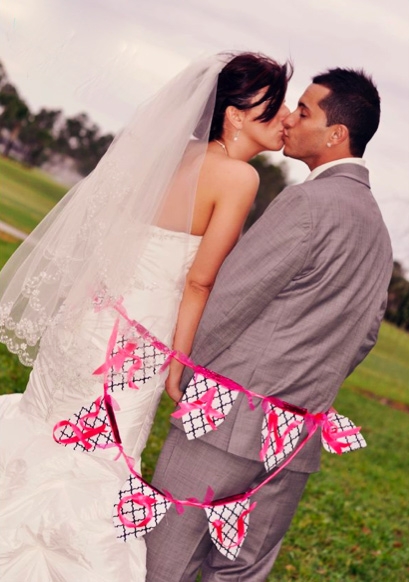
This DIY challenge is one that does not involve painting, drawing, or stitching. It does, however, require some patience, at least according to my good friend Kimberlee C. of Bluebird Photography, who created the banner showcased in this post.
As a budding Tampa photographer, she enjoys incorporating her crafty side with the weddings, engagements, or children that she often photographs. One way she does this is by creating custom "Thank You" banners to bring along on wedding shoots. After the big moment, while she takes the bridal party photos, the bride and groom also pose for a few pictures with the thoughtfully provided handmade banner. Viola! Instant thank you card image, and one less thing for a bride to worry about.
Not a photog? No worries.
You can use the banners as bedroom decor, party props, or even in the classroom. They're an easy way to personalize and spread some color throughout a space.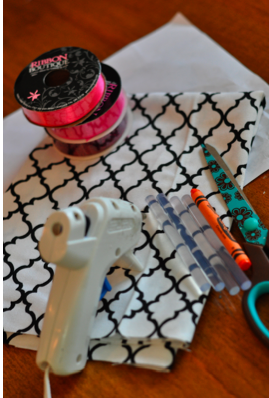
DIY TUTORIAL: Custom 'Ribbon Word' Banners
What you'll need:
Fabric
Glitter ribbon
Spool of 1” ribbon
Third ribbon color for trim
Scissors
Glue, or hot glue gun
Piece of cardboard
Patience
Step 1. Decide how large you want the base fabric pieces of your custom banner to be. Cut a triangle shape in the correct size out of a piece of cardboard.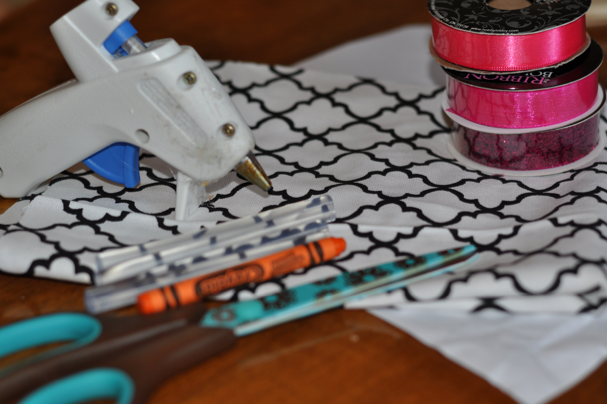
 Step 2. Determine which phrase you want to write on your banner, which will tell you how many triangle shapes you'll need. In this case, we're working with 'Thank You,' so we need 8 pieces of fabric. Cut these 8 pieces out of your chosen fabric in a triangle pattern, using the cardboard to guide you.
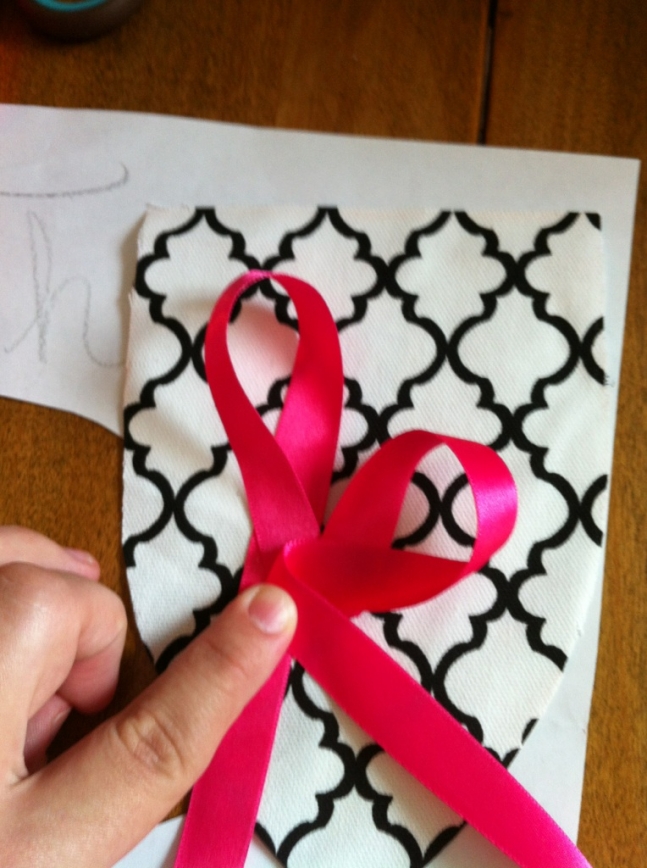
Step 3. This is the most challenging step, but you can do it! Using the 1” ribbon of your choice and glue/hot glue gun, create the letters one at a time (For this banner, “K” proved to be a challenge, but in the end the phrase came together beautifully). Use a large spool of ribbon so you don’t have to worry about running out. Be sure to give the glue time to dry before moving on to the next step.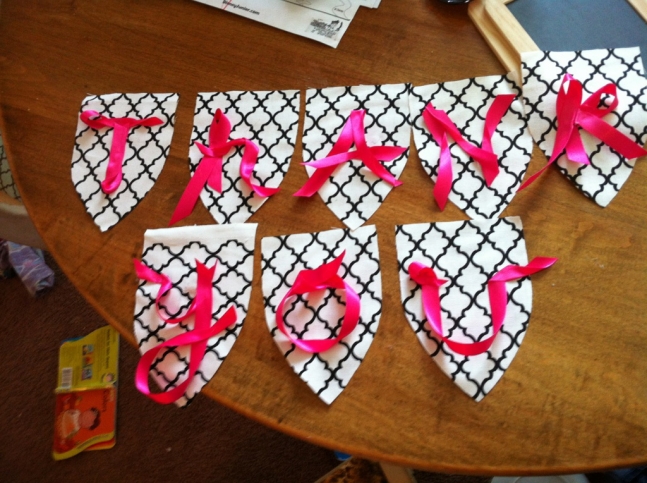
Step 4. Center your letters into the correct position on each panel. Carefully secure each of the ribbon letters to your fabric panels, using glue/hot glue gun. Give them time to dry.
Step 5. Lay your panels out in order. Cut out enough glitter ribbon to line the top of each panel, securing it with glue. Let dry.
Step 6. Lay the 1” ribbon across the top of each panel, leaving an extra foot or so at each end. Secure with glue and let dry.
Step 7. Using the third ribbon (in this case it’s a translucent pink), tie little bows around the 1” ribbon at the side of each panel.
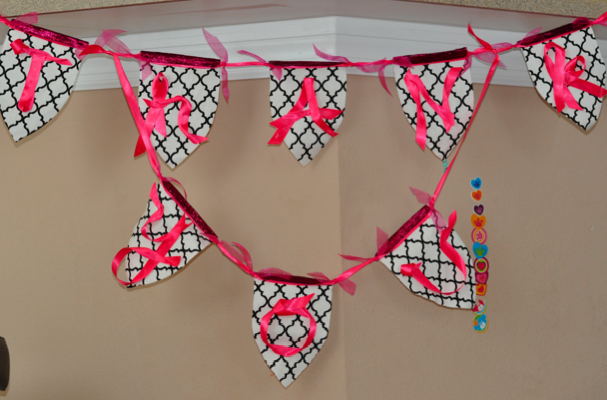
Step 8. Hang your beautiful new “ribbon word” banner in the location of your choice, whether it’s in a newborn’s nursery or a newlywed’s hands!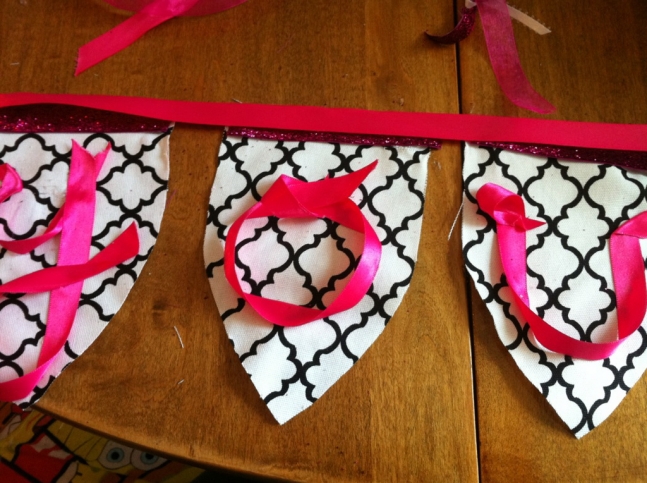
Still not convinced you could create one? Maybe this will get you started: Base banners are available at iCraft prop shop Chasenlevi.
Special thanks to Kimberlee Cortes for sharing her crafty wisdom!
What kinds of decorative crafts do you like to create? Tell us in the comments!
Photo Credit: Bluebird Photography
- Category:
- Tips, Tutorials & DIYs
- Tags:
- banner
- diy
- do it yourself
- tutorial
- ribbon
- felt
- glitter
- glue
- projects
- props
- pennant
- flag