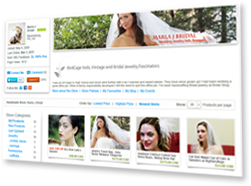
At this point in the banner design, we are ready to add your business name to the banner. You have already decided on the font you wish to use so let's get started.
1. Open your banner into Photoshop.
2. Choose the Horizontal Type Tool (looks like a T) from the Tools panel. Click inside the banner to activate the tool. You should see a blinking cursor. Click on the colored square in the Options Bar to open the Color Picker. Choose a color for the text. If your background is a light color, you will want to use black or a dark color for your text. Type your business name.
3. Select the text. Go to the Font Family drop-down list and choose your font.
4. Go to the Font Size drop-down list and set the size to 30 pts. Depending on the number of characters in your business name and the font you have chosen, you might need to adjust the size setting until your name fits nicely within the blank area of the banner. Click on the Commit button (checkmark in the Options Bar) to set the text styling.
If necessary, use the Move tool to fine-turn the position of the text.

We need to add one last detail to our banner design. Using the same color that we did for our text, we can add a small square of color at the left edge of the banner.
5. Add a new layer in the Layers panel.
6. First we need to set the Foreground Color. Click on the top, small square in the Tools panel to open the Color Picker again. Remember that this small square is at the bottom of the panel. When the Color Picker is open, your mouse automatically becomes an Eyedropper tool.
7. Go back to the banner and click on the text. This will set the Foreground Color to the text's color. Close the Color Picker.
8. From the Tools panel, choose the Rectangular Marquee tool (second from top). Starting at the top left corner of the banner, click and drag to draw a rectangular selection that is about one-fourth to one-third the width of the product photo.
9. With the Paint Bucket tool, click within this selection to fill it with the color. From the Menubar, click Select – Deselect.

10. At last, we can save our banner for the web. From the Menubar, click File – Save for Web and Devices. Save the banner in the JPEG format.
You can download a free trial version of Adobe Photoshop from the Adobe website.
- Category:
- Selling Online
- Tags:
- your iCraft store
- banner
- digital art
- DIY banner
- for newbies
- using Photoshop


