- Community >
- Blog Central >
- Blog by HandcraftedAffairs >
- DIY Wedding Invitations
| Oct 4 |
DIY Wedding Invitations
|

 Planning a wedding can be a crafty girl’s dream come true, and it all starts with the wedding invitations!
The wedding invitations set the tone for your entire event, so when it was time for my husband and I to pick our invitations, we decided to go the do-it-yourself (DIY) route.
Between my craftiness and my husband’s amazing artistic ability, we decided we wanted to make our wedding invitations completely original and personalized. Full-fledged DIY may not be possible for everyone, but there are plenty of ways to add personal touches to your wedding invitations that won’t break the bank!
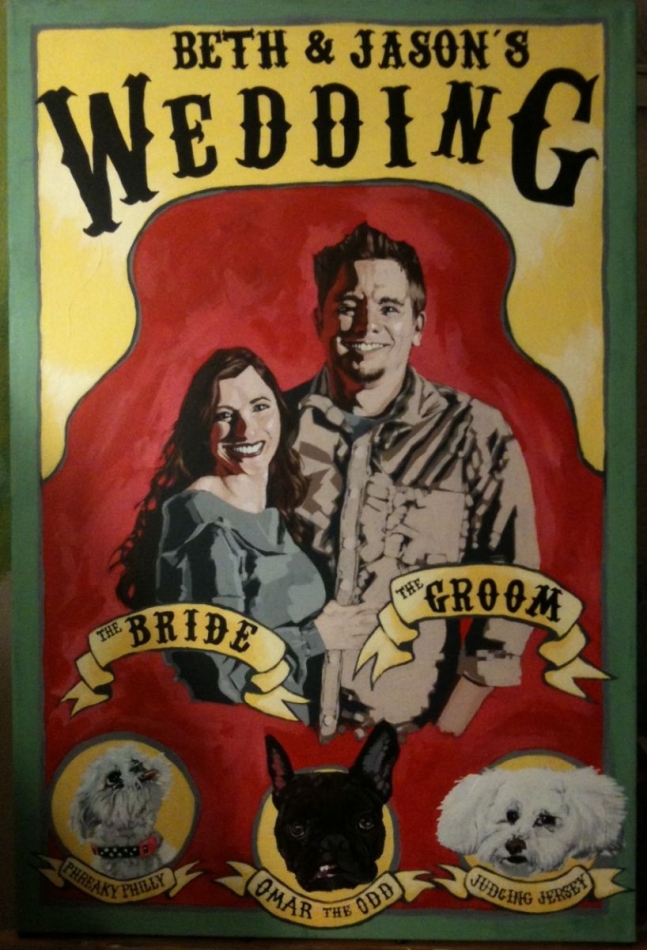
The focal point of our wedding invitation was a painting done by my amazing husband, which we then photographed and scaled to a standard 5x7 invitation size. The painting was inspired by vintage carnival and circus posters and the portrait was based on a photograph from our engagement shoot with the fabulous Paparella.
We wanted our guests to know from the second they opened our wedding invitations that they were in for a good time!
While we take marriage very seriously, we wanted our wedding to reflect our personalities and be fun...and our DIY wedding invitation was the perfect way to communicate that.
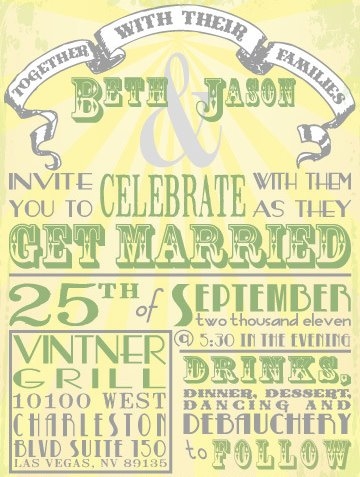
For the information portion of our wedding invitation, we decided to go with a variety of bold, graphic fonts.
An easy way to create invitations that looks super expensive and modern is to mix fonts and text sizes.
There are tons of free font download sites online where you can search through thousands of fonts to find the ones that fit your style and theme. My favorite site is dafont. There are a seemingly infinite amount of fonts and they are all free to download!
Although there are many etiquette rules when it comes to wedding invitation wording, we decided to go with a slightly more “casual” and fun invitation wording style.
Our invitation included the painting, the actual invitation, a "details" card that included hotel information, our wedding website, and an RSVP card.
Don't forget to lightly number your RSVP cards on the back corresponding to your guest list so that you know who has sent it back if they forget to write their name!
I decided to create a belly band with a "family crest" to keep all our our elements together.
I simply used a paper cutter to cut standard size card stock into 1.5" x 11" strips. I then used a butter knife and a ruler to score the strips so they would fold perfectly around my 5" wide invitations. My husband created our "family crest" with our initials in a 2" circle so that I could use my handy craft punch to cut out perfect circles, which I then attached to my cardstock belly bands with a glue stick. The last step was sliding them over my assembled invitations!
I did contemplate doing DIY pocketfolds and found many great online tutorials, but ultimately decided to go with belly bands, as it weighs less and would be less postage! However, if you are feeling adventurous, give this tutorial a try: DIY Pocketfolds. They do add a very classy and professional touch to your invites!
We got so many compliments on our DIY wedding invitations and our friends and family all commented on how our invitations were totally “us.” Mission accomplished!
Don’t be afraid to break some of the wedding rules and infuse your personality into your wedding invitations and the rest of your special day :-)
- Category:
- Tips, Tutorials & DIYs
- Love & Romance
- Tags:
- wedding invitations
- diy
- modern invitations
- wedding
- invitations
2 Comments
Oct 5, 2011 | The Knitting Lady